Create your own Nordic candle holder with porcelain-effect plaster
Minimalism, neutral tones, natural materials: Nordic style has been a favorite in furniture and decoration for years, capable of transforming any room into a welcoming, balanced, and visually relaxing space. One of the iconic elements of Scandinavian style is the candle. Small objects of light that, when enhanced with a simple yet sophisticated design, can completely transform the atmosphere of a room. In this tutorial, we'll show you how to make DIY candle holders in perfect Nordic style using Aqua Resin , a natural, non-toxic alpha resin that offers a stunning porcelain effect.
Why use Aqua Resin for candle holders?
Aqua Resin is a powdered mineral resin of the alpha gypsum type, a professional material with superior characteristics compared to common gypsum. Its texture is silky, compact, durable, and incredibly smooth to the touch. Perfect for those seeking a refined and understated aesthetic, typical of Scandinavian design.
Unlike epoxy or acrylic resins, Aqua Resin emits no toxic fumes, can be worked with water, is completely safe even in domestic environments, and dries quickly. It's the perfect ally for craft creations and home décor projects.
Nordic style: clean lines, neutral colors, and natural warmth
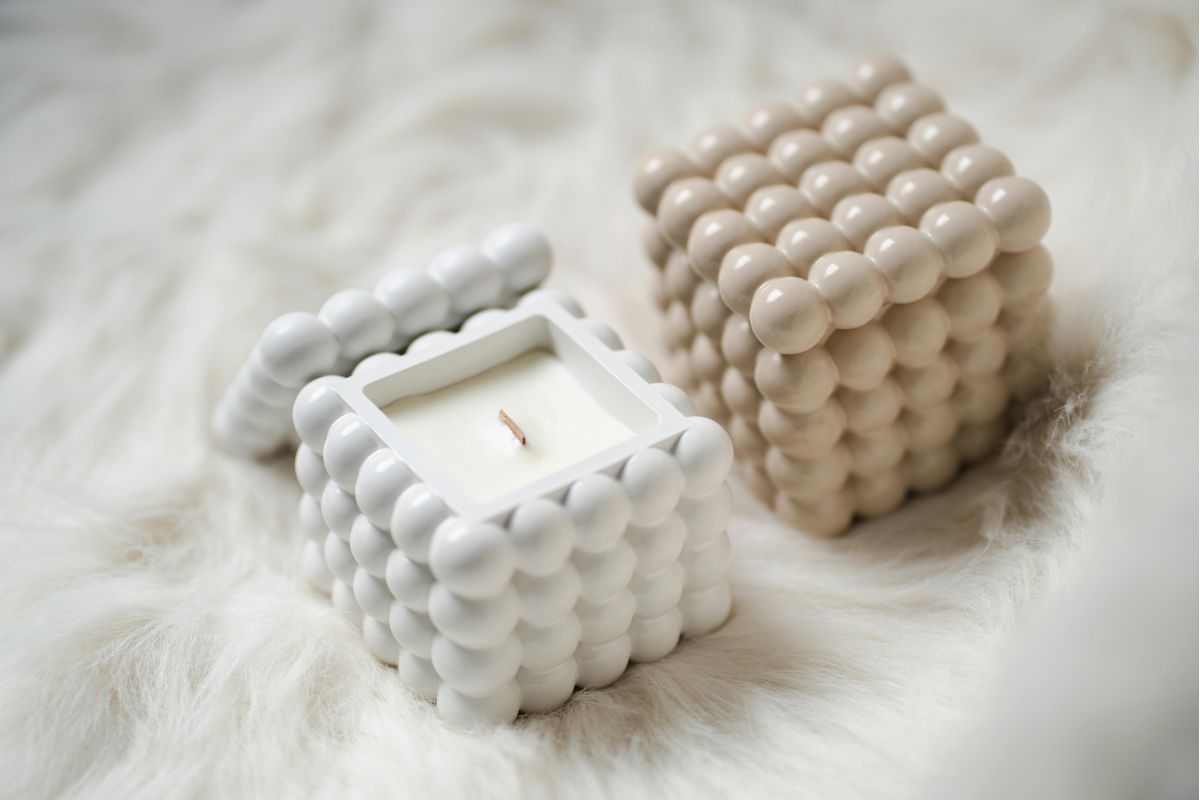
Nordic-style candle holders are distinguished by their simple shapes and neutral colors: pure white, light gray, beige, sand, or dusty, natural hues like terracotta, dusty pink, sage, or charcoal. The lines can be rounded or geometric, but always clean and unobtrusive. It's precisely this simplicity that lends elegance and authenticity.
What you need to get started
-
Water or Aqua Shield if you want more resistance
-
Silicone molds for candle holders (round, hexagonal, cylindrical or geometric)
-
Natural pigments or Aqua Pigment to color the mixture
-
Glass containers for candles (optional)
-
Spatula and kitchen scale
-
Fine sandpaper for smoothing
-
Essential oil or finishing wax
How to prepare candle holders
1. Prepare the mixture
Pour 50 g of water into a bowl (or Aqua Shield for a brighter, moisture-resistant finish). Add pigment if you want to color the base. Then slowly add 100 g of sifted Aqua Resin . Mix well until you obtain a smooth, fluid paste with no lumps.
2. Pour into molds
Fill the mold of your choice, tapping it lightly on the table to release any air bubbles. If you want to use a glass or metal container for the candle, you can place it immediately or glue it in place later.
3. Let it dry
After about 60–90 minutes, you can carefully unmold the mold. If you used Aqua Shield , the curing time may increase slightly. Let it dry completely for another 24 hours.
4. Refine
Use fine sandpaper to smooth out any imperfections, edges, or bubbles.
5. Decorate (optional)
You can add a touch of wax, linseed oil, or natural fragrances, or leave the chalk natural for a more authentic result.
Style variations
Minimal chic
Pure white, clean geometric shapes, and a smooth, glossy surface. Perfect for modern or Japanese-style spaces.
Nordic rustic
Light gray in color, slightly rough texture, and irregular edges. Pair with light wood, linen, and jute.
Dusty colors
Use neutral and nuanced pigments: sage, dusty pink, terracotta, mustard. Ideal for adding a more personal touch while maintaining stylistic coherence.
Marbled effect
Add two different colors to the mixture and pour them alternately into the mold. Stir lightly only on the surface with a toothpick. The result will be delicate and surprising.
With natural inclusions
You can add small dried leaves, lavender, dried flowers, or fabric scraps to make each piece truly unique.
Where to use handmade candle holders
-
In the living room as a centerpiece
-
In the bedroom to create a relaxing atmosphere
-
In the bathroom for moments of relaxation
-
As a wedding, baptism or communion favor
-
As a handmade gift
-
At craft markets or in your creative projects to sell
How to protect candle holders
Aqua Resin is durable, but to increase its durability, you can protect each creation by applying Aqua Shield . This treatment makes the surface more waterproof and makes cleaning easier over time.
Practical advice
-
Avoid overly flexible molds if you are a beginner.
-
Always prepare a few grams of extra mixture to avoid waste.
-
If you want a more textured effect, leave the pigment not completely blended.
-
You can also create multiple candle holders or multi-tiered stands
-
Avoid candles that are too large or have a strong flame: always choose candles contained in jars or tealights
How much material do you need?
With 100 g of Aqua Resin, you can create one or two small candle holders or one medium-sized one. If you want to make a set of three, you'll need about 300 g.
What can you do with leftovers?
If you have any leftover mixture, pour it into small heart, flower, leaf, or star-shaped molds. You can use them as place cards, party favors, drawer fresheners, or as decorative elements for your table.
Conclusion: the beauty of handmade light
Making a DIY candle holder with Aqua Resin means bringing home a piece of authentic beauty. It's not just an object, but a gesture, a story, a creative energy transformed into light. Nordic style teaches us that little is needed to make spaces warm and alive: a simple shape, a natural color, a dancing flame.
With a little manual skill and the right materials you can create furnishing objects with a strong aesthetic impact, perfect for you, for your home, for your gifts or for anyone who wants to give an artisanal face to their creative activity.
Share:
0 comments
Your first project? Start here and save 10%!
Download the free eBook with step-by-step tutorials and original ideas to get started. All you need is your email address!