
Best Techniques for Creative Plaster: A Practical Guide for DIY
TL;DR:
The best techniques for creative plaster start with a correct mixture, slow pouring and the use of suitable silicone molds.
Aqua Resin is a premium alpha plaster, 100% natural and VOC-free, designed to create favors, trays, candle holders and home decor with a smooth porcelain-effect finish.
Pigments, Aqua Metal, glitter, gold leaf and a suitable protective finish help personalize and enhance every creation.
Creative plaster is one of the simplest and most rewarding materials for creating home decor projects, favors, trays, candle holders and small handmade decorative objects.
With the right techniques, you can improve the performance of the mixture, reduce bubbles and imperfections, obtain a cleaner pour and personalize every creation with pigments, glitter, Aqua Metal or gold leaf.
Aqua Resin, Reschimica’s premium alpha plaster, is designed for those who want to create in a safe, easy and beautiful way: it is 100% natural, VOC-free, safe for home use, mixes with water and offers a smooth porcelain-effect finish thanks to its ultrafine grain.
Index
-
Key points
-
Preparing the mixture: the foundation of every project
-
Pouring techniques with silicone molds
-
How to color and decorate creative plaster
-
Final finishing: sanding and protection
-
Comparative table of techniques
-
Common mistakes to avoid
-
Recommended products for creating with Aqua Resin
-
FAQ
Key points
| Point | Details |
|---|---|
| Correct mixture | Weighing water and powder helps obtain a homogeneous mixture that is easier to pour and has fewer defects. |
| Silicone molds | Flexible molds help demold more easily and preserve the details of the creation. |
| Slow pouring | Pouring the mixture calmly and tapping the mold helps reduce air bubbles and imperfections. |
| Decoration | Pigments, Aqua Metal, glitter, gold leaf and silver leaf allow you to personalize every object. |
| Finishing | Light sanding and a suitable protective finish enhance the final result. |
| Choice of plaster | Aqua Resin is a premium alpha plaster with ultrafine grain and a smooth porcelain-effect finish. |
Preparing the mixture: the foundation of every project
Everything starts with the mixture. Even a well-made mold can produce a poorly finished result if the mixture is too liquid, too dense or full of air bubbles.
The basic rule is simple: first pour the water into the container and then gradually add Aqua Resin, mixing calmly. This helps reduce lumps and incorporated air. For Aqua Resin, use the correct ratio: 100 parts powder and 30 parts water. Weighing the ingredients, especially the first few times, helps you obtain a more consistent texture and a more controlled pour.
The mixture should be fluid and creamy, suitable for flowing into the mold without being too liquid.
Some practical tips for the mixing phase:
-
Use room-temperature water.
-
Add Aqua Resin to the water gradually, without pouring all the powder at once.
-
Mix slowly with a spatula, avoiding overly vigorous movements.
-
Prepare the mold before mixing, so you can pour the mixture immediately.
-
Lightly tap the container or mold to help bubbles rise to the surface.
Pro Tip: prepare everything before starting: water, powder, scale, spatula and mold. Once the mixture is created, it is best to work without interruptions.
Prepare everything before starting: water, powder, scale, spatula and mold. Once the mixture is created, it is best to work without interruptions.
Pouring techniques with silicone molds
Silicone molds are among the most useful tools for working with creative plaster. They are flexible, practical and help obtain clean, detailed shapes, especially when the material used has a fine or ultrafine grain.
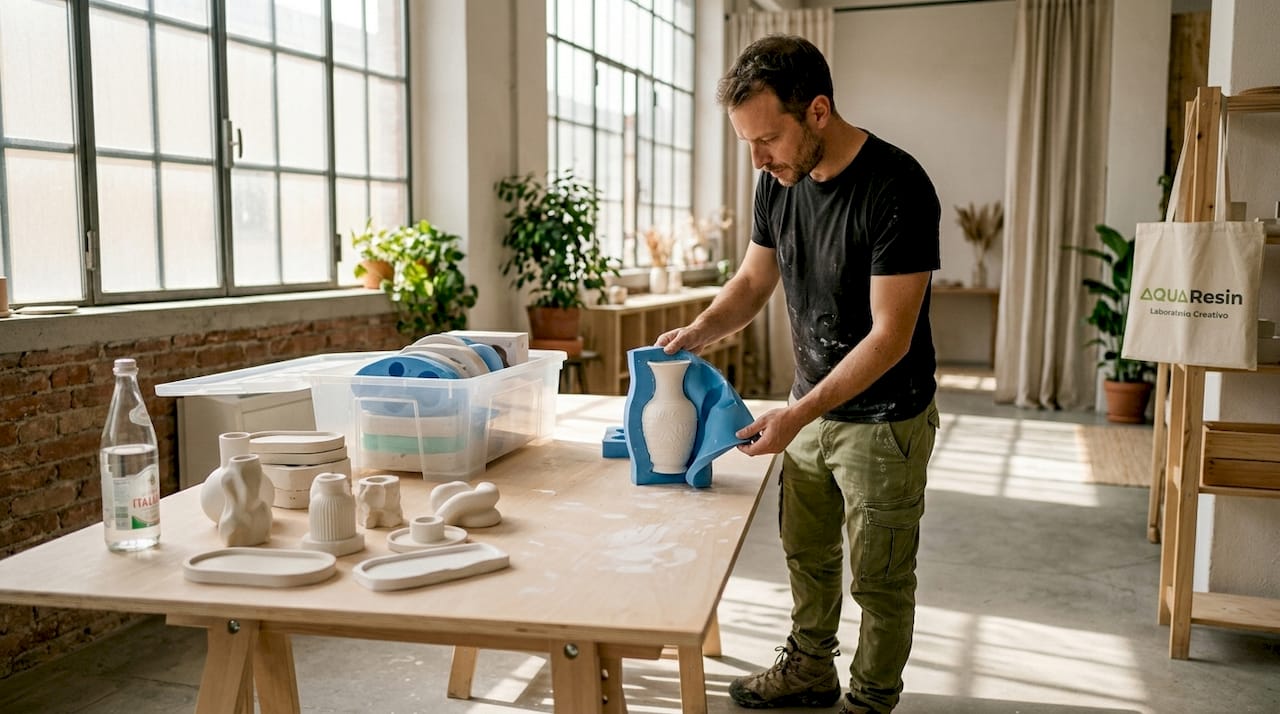
With many good-quality silicone molds, there is no need to complicate the process: the important thing is that the mold is clean, dry and placed on a flat surface before pouring. If you use particularly complex or highly detailed molds, always do a small test before the final project.
Here are the key steps for a successful pour:
-
Place the mold on a flat and stable surface.
-
Pour the mixture slowly, starting from one point of the mold.
-
If the mold has deep details, first pour a small layer and distribute it well.
-
Gently tap the mold on the table to help air bubbles rise.
-
Let it rest without moving the mold until demolding time.
With Aqua Resin, creations can be demolded in about 30 minutes. Times may vary depending on the thickness of the object, the shape of the mold and environmental conditions.
You can use different molds depending on the project: round molds for classic trays, organic shapes for catchall trays and smaller molds for favors or decorations.
Pro Tip: never force demolding. Gently bend the mold outward and guide the piece out, especially if there are thin details.
How to color and decorate creative plaster
Decoration is the moment when every creation truly gains personality. You can work on the color of the mixture, intervene on the dry surface or combine several techniques to obtain different effects.
Pigments and mass coloring
You can use Aqua Pigment to color the mixture before pouring. Start with small quantities and always do a test: the color may change slightly once dry.
For more decorative effects, you can also work on the dry surface with acrylic paint, Aqua Metal or small contrasting details.
Aqua Metal for metallic effects
Aqua Metal is applied with a brush on the dry surface and allows you to create gold, silver, bronze or copper effects. It is especially useful on edges, reliefs and textures because it enhances the details of the shape.
Gold leaf and silver leaf
Gold leaf and silver leaf are ideal for making trays, favors and small decorative objects more elegant. Apply them on the dry surface with a suitable adhesive, working with a soft brush and without pressing too hard.
For a cleaner result, do a test on a sample before decorating the final project.
Pro Tip: combine a colored base with small metallic details on the edges or reliefs. It is a simple but very effective technique for giving the creation more depth.
Final finishing: sanding and protection
Finishing is the step that makes a creation look more refined. Although Aqua Resin already offers a smooth porcelain-effect surface, light sanding can help correct small imperfections or uneven edges.
For finishing, use fine sandpaper and work with light movements, without insisting too much on the same spot. After sanding, remove the dust well with a dry or slightly damp cloth and let the piece stabilize before applying any finishes.
To protect creations, you can use a protective finish suitable for creative plaster. If the project may come into contact with moisture, wax or frequent use, consider Aqua Shield to support surface protection.
Always apply thin, even layers, following the instructions of the chosen product. Several light coats are better than one coat that is too thick.
How to apply it best:
-
Make sure the piece is dry and clean.
-
Apply the finish in thin layers.
-
Let it dry between coats.
-
Avoid build-up in corners or smaller details.
-
Always do a test on a sample before the final project.
Pro Tip: use a soft brush and work in a clean environment, so you avoid visible marks or dust on the surface while the finish dries.
5. Comparative table of creative plaster working techniques
Choosing the right technique depends on the type of project, the time available and the result you want to achieve. This overview helps you find your way quickly.
| Technique | Ideal for | Difficulty | When to use it | Result |
|---|---|---|---|---|
| Basic mixture and pouring | Favors, coasters, catchall trays | Low | When you want to start with simple shapes | Smooth and clean surface |
| Pouring into shaped molds | Trays, candle holders, decorations | Low/medium | When the mold has details or special shapes | More defined shapes |
| Coloring with pigments | All projects | Low | Before pouring or on the dry surface | Customized colors |
| Aqua Metal and glitter | Gifts, home decor, favors | Medium | After drying | Glossy or metallic effect |
| Gold or silver leaf | Elegant favors, trays, details | Medium | On the dry surface | Refined decorative detail |
| Sanding and protection | Finished projects | Low | After demolding and drying | More refined finish |
For beginners, the simplest combination is: Aqua Resin, silicone mold, slow pouring, light vibration of the mold and essential decoration with pigments or Aqua Metal. It is an easy path to control and suitable for small home decor objects, favors and handmade gifts.
To explore the possibilities of plaster in hobby crafting, you will find many creative ideas and tips for every level of experience.
Common mistakes in creative plaster techniques
One of the most common mistakes is mixing too quickly. When you incorporate too much air into the mixture, the chances of seeing bubbles or small craters on the final surface increase.
Another mistake is pouring too fast. It is better to pour slowly, let the mixture reach the mold details and tap gently to help the air rise.
The third mistake is decorating or finishing too early. Even if the creation can be demolded in about 30 minutes, for sanding, painting or protecting the surface it is better to wait until the piece is fully dry and stable.
Finally, do not underestimate the starting material. A premium alpha plaster like Aqua Resin, thanks to its ultrafine grain and smooth porcelain-effect finish, helps achieve more refined results even in the first projects.
The right technique does not take spontaneity away from creativity: it makes it easier to express.
Recommended products for creating with Aqua Resin
If you want to put these techniques into practice, you can start with white Aqua Resin, the premium alpha plaster designed for creative DIY. It is 100% natural, VOC-free, safe for home use, mixes with water and allows creations to be demolded in about 30 minutes.
Thanks to its ultrafine grain, Aqua Resin helps obtain smooth surfaces, more defined details and a porcelain-effect finish ideal for favors, trays, candle holders, catchall trays and home decor.
To personalize your creations, you can combine Aqua Pigment, Aqua Metal, Aqua Glitter, gold leaf, silver leaf and silicone molds. This way you can start from a simple technique and transform it into a personal, refined project consistent with your style.
FAQ
How do you mix Aqua Resin correctly?
First pour the water into the container and gradually add Aqua Resin, mixing slowly with a spatula. Use the correct ratio: 100 parts powder and 30 parts water. Avoid overly vigorous movements to reduce incorporated air.
How long does it take to demold plaster creations?
With Aqua Resin, creations can be demolded in about 30 minutes. Times may vary depending on thickness, mold shape and environmental conditions.
How do you apply gold leaf on creative plaster?
Apply gold leaf on the dry surface using a suitable adhesive. Work with a soft brush and do a test on a sample first, especially if you want to decorate favors or trays.
How can I protect a creative plaster creation?
You can use a protective finish suitable for creative plaster. For projects exposed to moisture, wax or frequent use, consider Aqua Shield and always follow the instructions of the chosen product.
Which silicone molds are suitable for creative plaster?
Flexible, clean and well-finished silicone molds are suitable. To start, you can choose simple shapes such as trays, catchall trays, candle holders or small molds for favors.
Useful products and resources
-
Guide to plaster in hobby crafting: creative ideas, techniques and tips to get started.
-
Why use creative plaster: benefits and ideas for DIY.
-
White Aqua Resin: premium alpha plaster, extra white, 100% natural, VOC-free, safe and easy to use.
-
Aqua Resin Terracotta Roma: premium alpha plaster already pigmented in a terracotta shade.
-
Aqua Metal and gold/silver leaf: decorative finishes to personalize creations.
-
Aqua Resin silicone molds: shapes for trays, candle holders, catchall trays and home decor.
Share:
0 comments
Prodotti consigliati in questo articolo


Your first project? Start here and save 10%!
Download the free eBook with step-by-step tutorials and original ideas to get started. All you need is your email address!